Terminals
✔️ Payments Users
Terminal request
To start working with unTill Payments you need to establish the terminals for Location. The payments users may not know exactly which specific model of terminals is needed. That is a reason why unTill Partners come to the help in such cases.
As a payments user, you need to contact your unTill Partner and tell them that you need terminals. The unTill Partner will then contact unTill to arrange for the terminals to be linked to the Location through the Adyen platform and delivered to your restaurant or Point of Sale.
Prepare the terminal
To prepare the terminal for work, you need to perform some actions depending on the model of the terminal:
- AMS1
- P400Plus
- SFO1
- Connect the device to the power supply and switch it on. Wait until the startup screen has fully loaded.
- After startup, an installation wizard will appear automatically. Please follow the on-screen steps to configure language, time zone, etc., until you reach the Wi-Fi setup.
- Connect to Wi-Fi selecting your Wi-Fi network. To open the Wi-Fi settings, enter the password 5748. Once the device shows 'connected', the connection is successful.
- Connect the device to the power supply and switch it on. Wait until the startup screen has fully loaded.
- Connect to Wi-Fi selecting your Wi-Fi network. To open the Wi-Fi settings, enter the password 5748. Once the device shows 'connected', the connection is successful.
- Select 'Board the terminal', select your store and tap 'Confirm'
Boarding process can take up to 30 minutes.
- Connect the device to a power source. Depending on the network you are going to use:
- If you use Wi-Fi network, connect the power adapter to the terminal and to a power source
- If you use LAN, connect the power cable ti the Ethernet-to-USB-C dongle and to a power source, and connect the dongle to the terminal.
- After startup, an installation wizard will appear automatically. Please follow the on-screen steps to configure language, time zone, etc., until you reach the Wi-Fi setup.
- Connect to Wi-Fi selecting your Wi-Fi network. To open the Wi-Fi settings, enter the password 5748. Once the device shows 'connected', the connection is successful.
The terminals are activated automatically and displayed in the Payments portal in the corresponding section. All activated terminals are also automatically added to the Back Office, including their POIID, so you do not need to enter it manually.
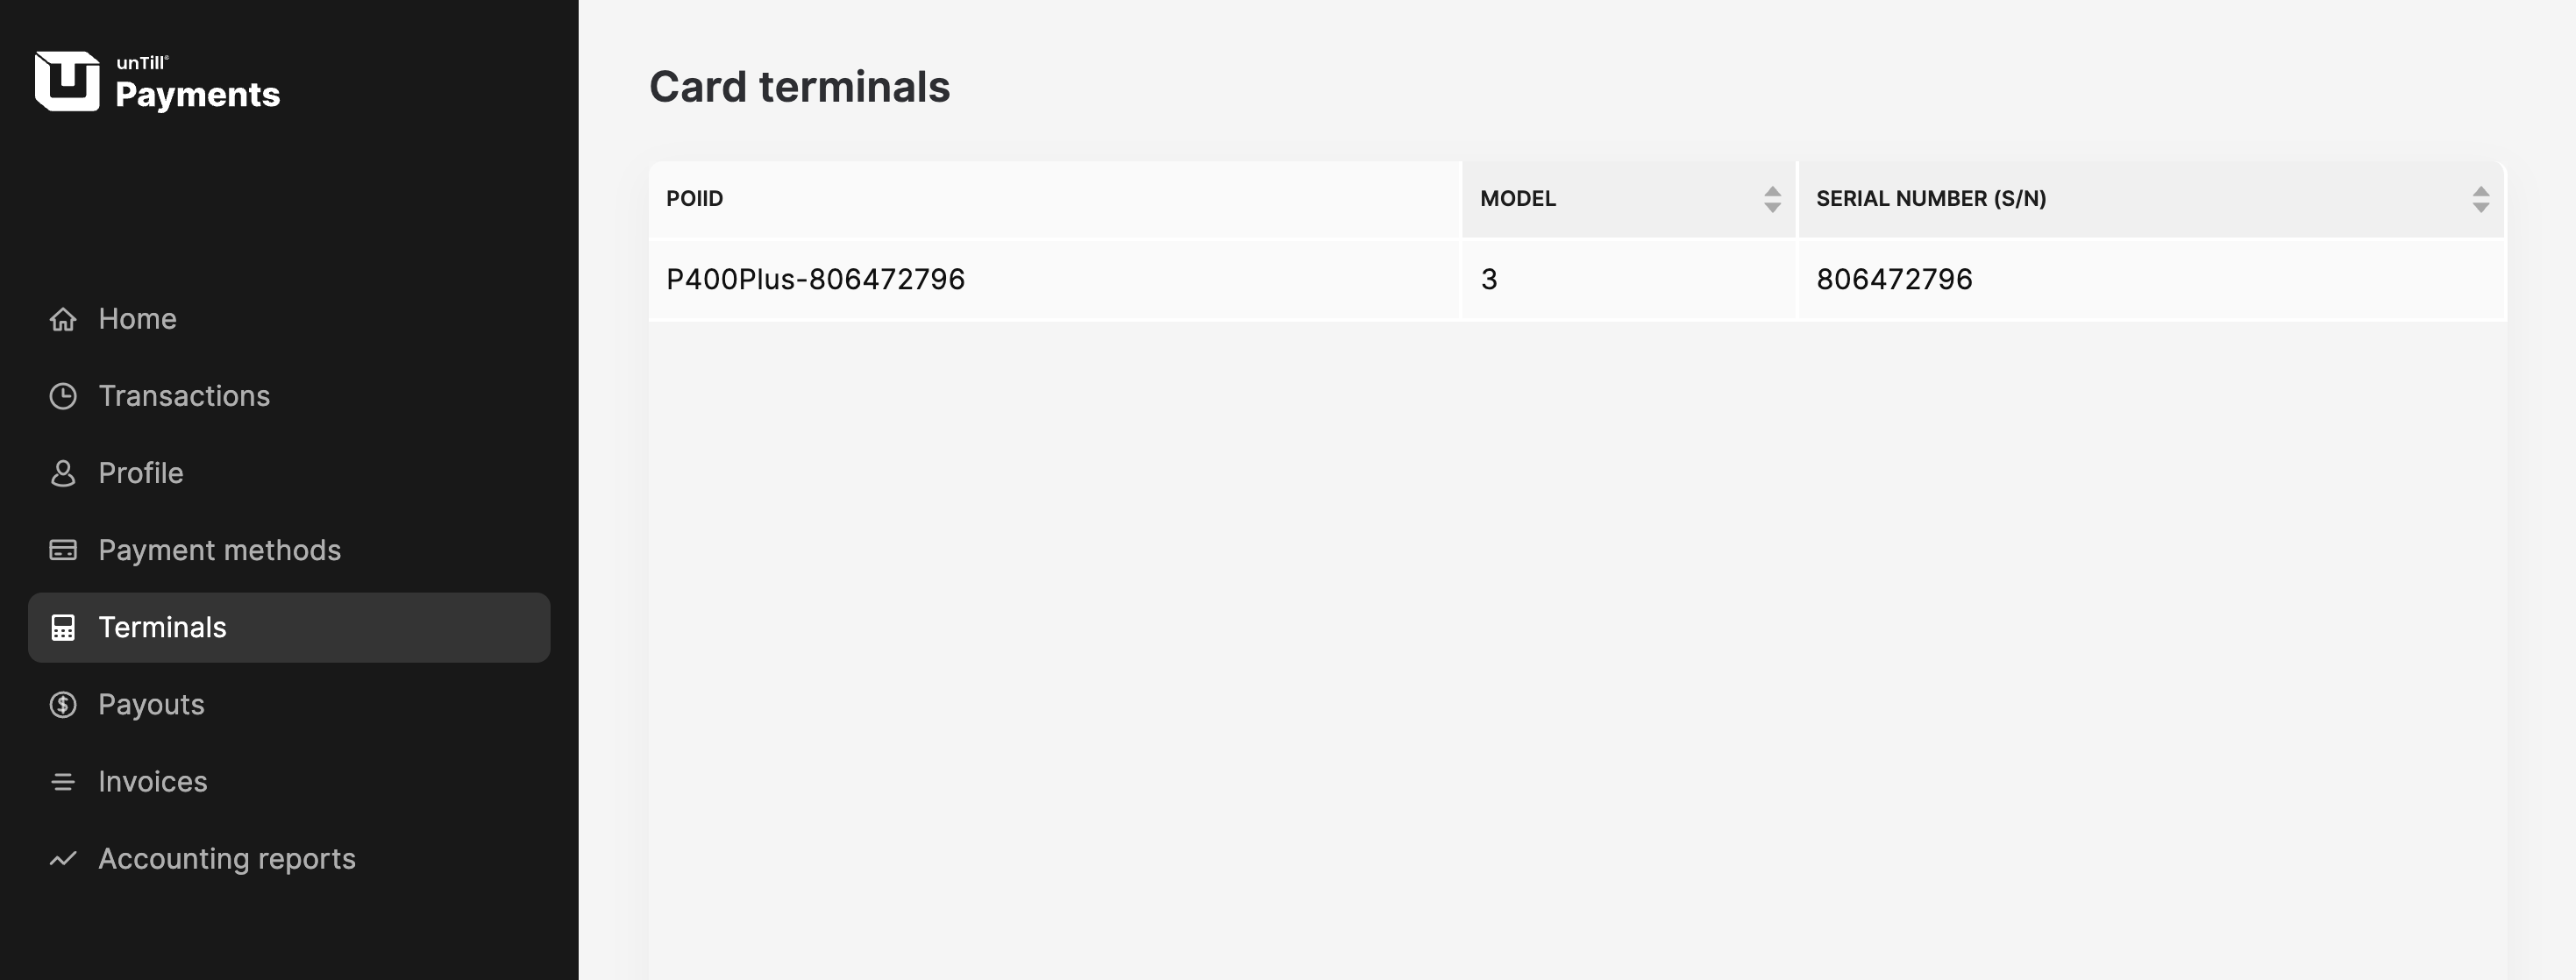
Configure a terminal in unTill Prime
To configure a terminal in unTill Prime, you need to add a driver. To do this, please go to Back Office and create a driver filling out requested fields. In order to retrieve the Location ID and API token, please go to your Payments profile in the unTill Payments portal and copy the credentials displayed in the unTill Payments credentials section.
For more details about configuring a driver, please refer to this unTill Prime article.
Assign terminal to a screen
You can assign a terminal to a specific screen in the unTill Air Back Office. To do this, go to Back Office > Equipment > Screens, edit the relevant screen, and assign a payment terminal to it.
For more information about managing screen settings, refer to this page.
If a terminal is not assigned to a screen, the user will be prompted to assign it during the first card payment transaction in the POS.
Test payment
After completing the configuration process, we recommend performing a small test payment via unTill Air to ensure everything works correctly. Once the payment is visible in the portal, the system is fully active.
To process transactions via card terminals, make sure you have added the ‘card’ (pin in Dutch) payment method to your Back Office. Upon processing a transaction via your card terminal, always press ‘Card’ in the POS system to get the amount appear on the card terminal.
Access the transactions details
On your terminal, you can view details of completed transactions in the relevant section. There, you can check the transaction history, total amounts, and other related information. To access this section, use the password '8060'.
NYC1 card reader
In unTill Payments, you can use the NYC1 card reader to accept card payments. This reader is an affordable and compact device that allows you to process card payments efficiently. Unlike standard payment terminals, NYC1 works as a card reader and has some important differences in behavior and supported features during payment and order reopening.
To start using the NYC1 reader, you first need to configure a new terminal in the Back Office. For instructions on how to configure a payment terminal, refer to the Set up payment terminals article. After creating the terminal, make sure it is assigned to the appropriate POS screen in the Back Office.
Once the terminal is set up and assigned to a screen, you can pair it with your POS by following these steps:
- In the POS, navigate to the main menu and select 'Device Management' to access the 'Card readers' section.
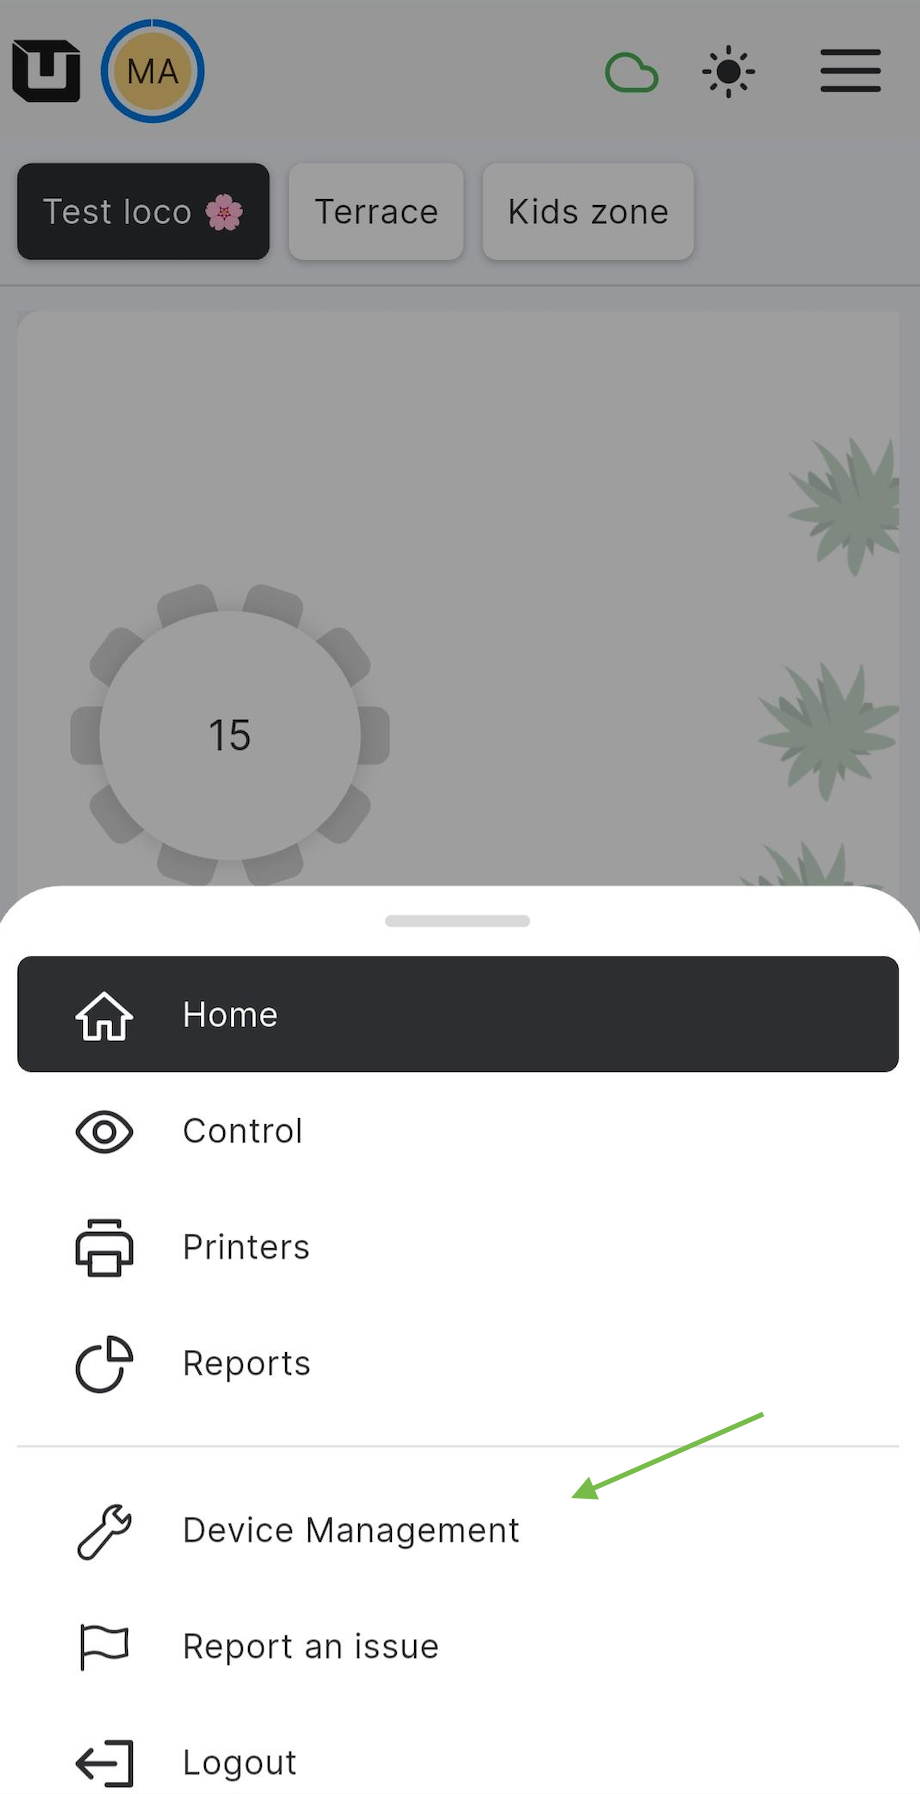
- Tap the '+' icon in the bottom-right corner and follow the instructions to pair the reader with the POS.
- The new terminal will appear in the 'Connected readers' list. You can now return to the app and start processing transactions.
When using NYC1, keep the following specifics in mind:
-
NYC1 does not support terminal tips.
-
NYC1 does not require PIN code verification for large payments.
-
If a payment was made via NYC1, the order can be reopened only from a POS device with NFC support.
-
NYC1 can be linked to only one POS device at a time. If it is connected to another device, it will be automatically unlinked from the previous one.